
Building a robot that can handle all aspects of application packaging
You have successfully used PowerShell to standardize and automate large parts of your application packaging process. Now you are wondering how you can take it one step further. In this article, we will look at how Intility has created their own application packaging bot and fully automated the process from A-Z by tying it all together in one system.
Introduction
Distributing and keeping applications updated across several Intune tenants, customers and management types is a demanding exercise. A standardized process is key for maintaining control and for enabling the possibility for a "one-to-many" delivery method. Intility has over several years utilized PowerShell Application Deployment Toolkit (PSADT) to standardize the application packaging process. The framework is well known for its functions, logging and decent UI. After 7+ years with feature requests and continuous improvement, our internal PSADT template has been extended with a modern GUI and increased functionality that has been specifically catered towards our needs.
However, the process of packaging and distributing an application is still heavily reliant on a technician that can collect the necessary installation files, wrap the PSADT toolkit around the .exe/.msi file, add the necessary code, before deploying the application to the correct management system(s). Is it possible to build a solution that can handle all aspects by simply pressing a button that says “Go”?
A short introduction to application packaging
Before we deep-dive into AppPackBot territory, we’ll start with a short introduction to the application packaging discipline. Application packaging is a discipline that specializes in deploying applications to end users. We see it as the art of getting software from the vendor to the work surface as seamlessly as possible, at scale. Intility delivers client management for both Windows and Mac clients, and leverages Software Center and Company Portal as dedicated application hubs.
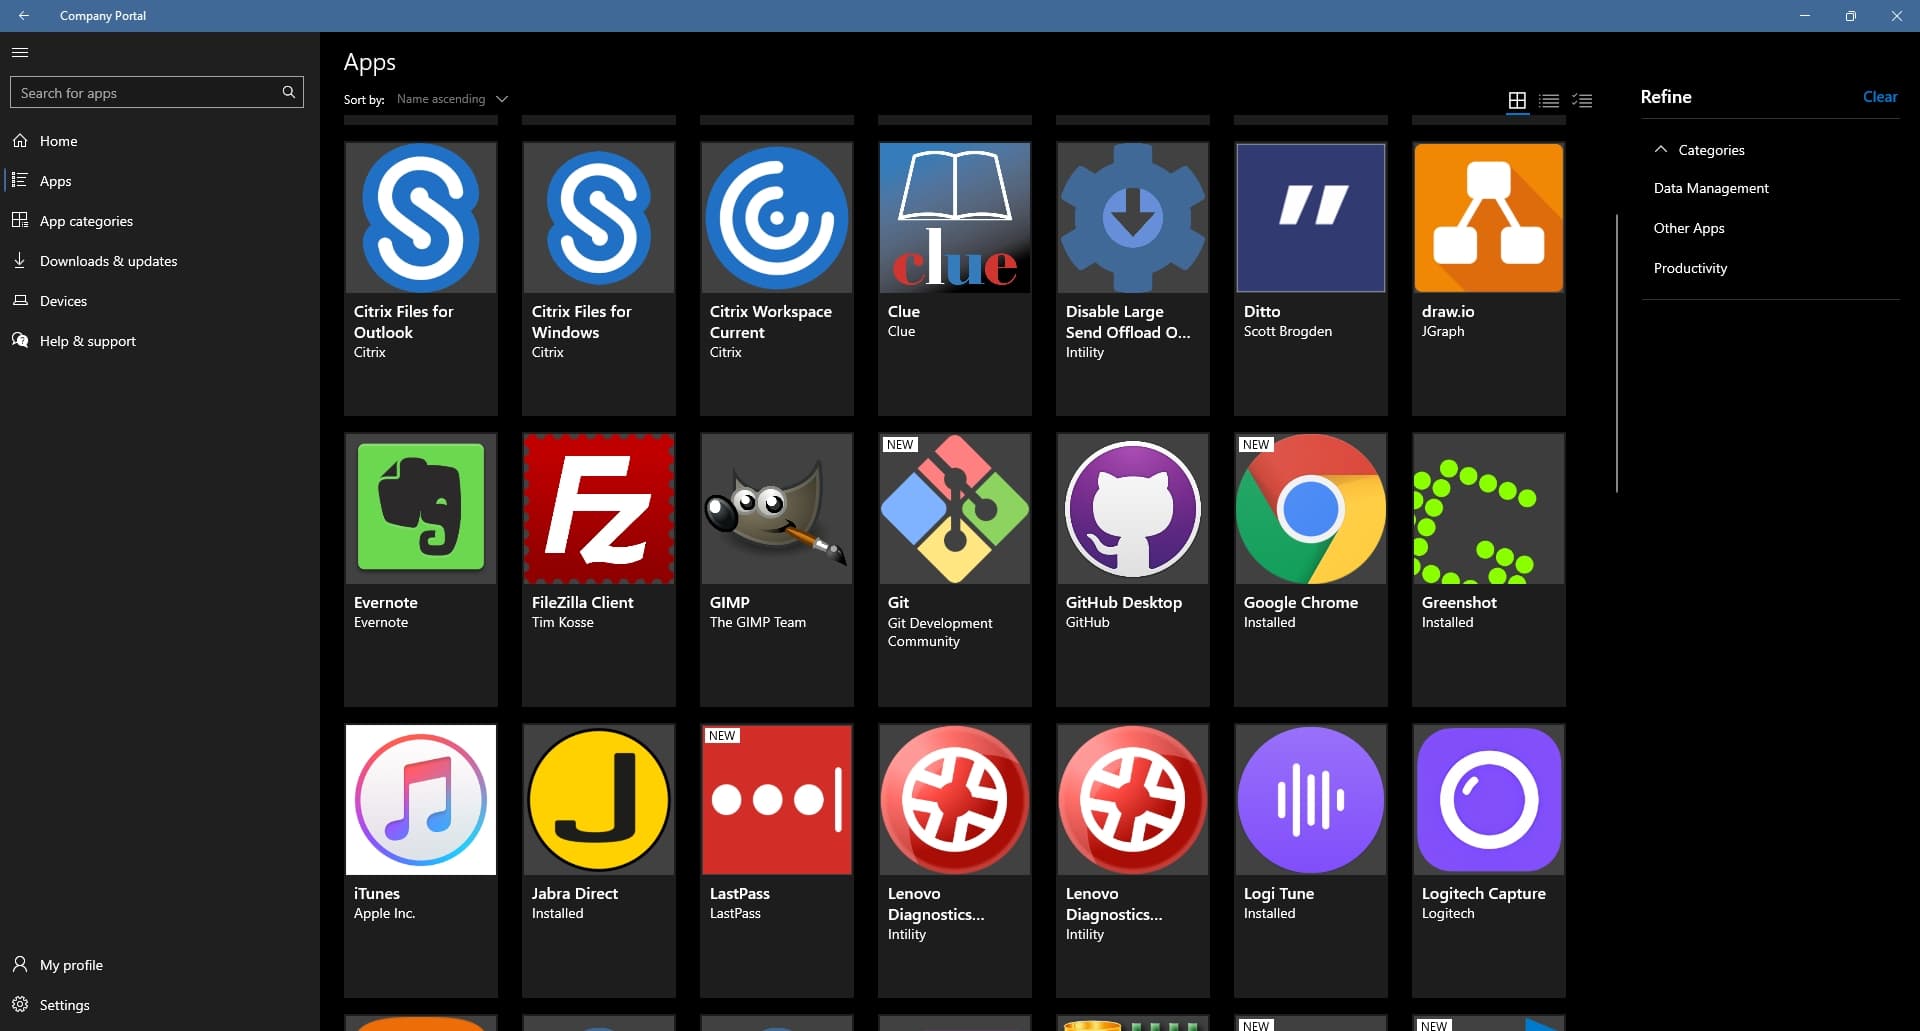
Company Portal
The process of publishing an application consists of several steps:
- Receive information about which application is needed, the application version and the installation files
- Read through the .exe or .msi installation file documentation
- Determine details such as:
- Installation context (user/system)
- Installer parameters
- Execution order
- Additional settings as config files or registry entries
- Whether the user needs to be involved at all during execution
- Write the logic as PowerShell code and placing files in the PSADT-framework
- When the content is created, it needs to be tested in a virtualized environment
- Once finished, use the appropriate management tool to initiate a deployment and monitor that everything goes as planned
Once packaged and deployed the end user can install the application:
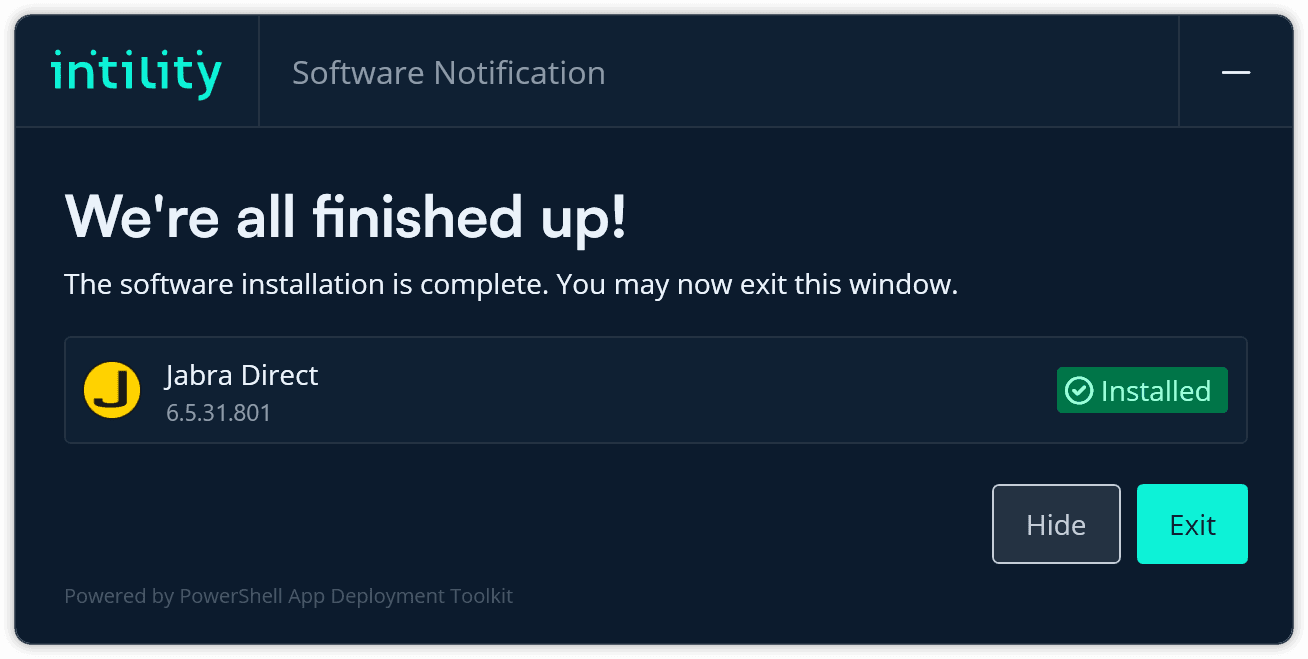
Self-developed modern GUI for PSADT installations
AppPackBot
AppPackBot is an application packaging robot that can also be seen as a virtual colleague. This is the overall design:
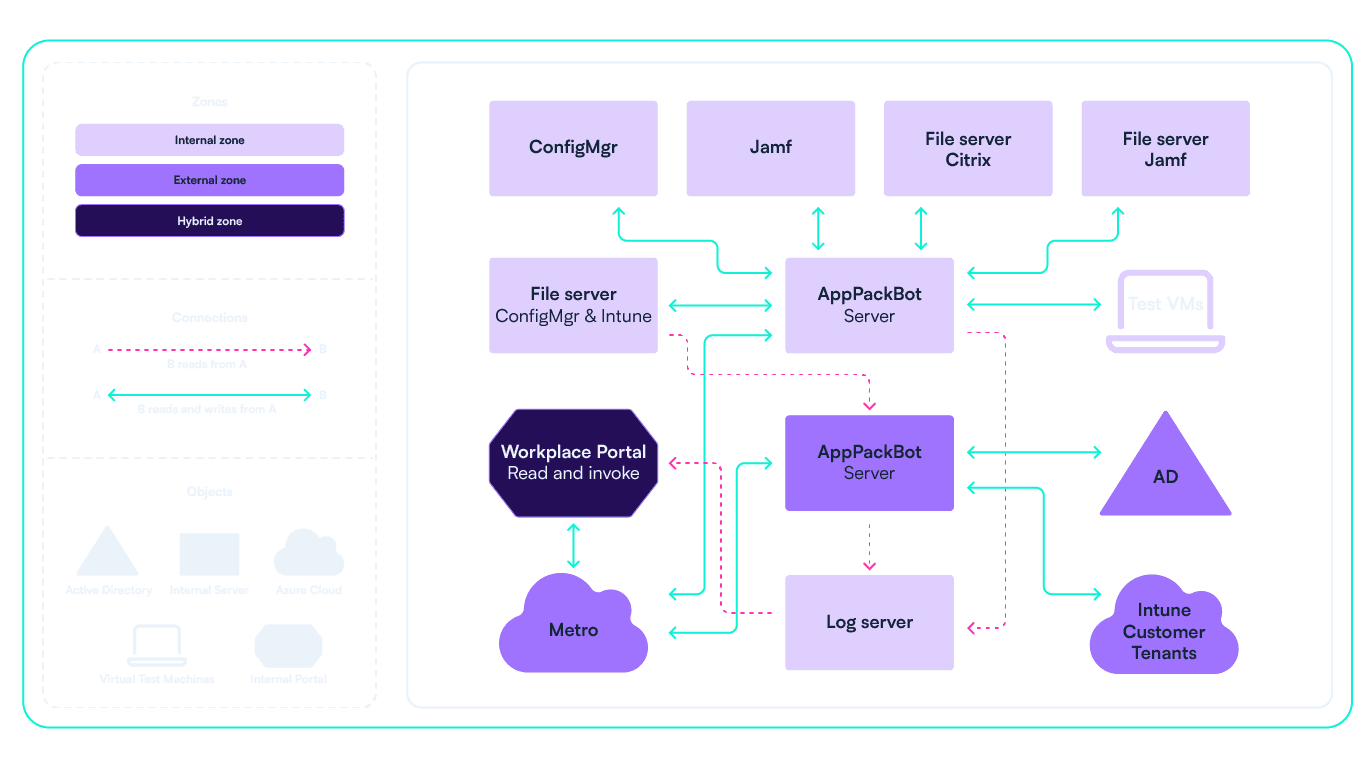
AppPackBot architecture
There are two servers. One for the internal platforms (hereafter called “Internal”), where the parts that are shared between customers get managed (such as shared applications). The second one manages the customer specific platforms and systems such as Intune tenants and AD domains (hereafter called “External”). This split reflects our security model, where the principle of Least Privilege is key.
All integrations to the systems the bot manages are PowerShell based, so it’s only logical to create the framework of the bot in PowerShell as well.
The bot can run packaging jobs in parallel and (re)run specific steps of jobs in case of retrying or skipping steps. All jobs have a unique GUID.
An API running on both servers were considered, but that would require the user to invoke the right server to run the given step. The servers would otherwise need to talk to each other and negotiate who should do what. We’d imagine this would create an even bigger complexity for the architecture and data flows.
Metro was the chosen design of the data flow. Metro is a combination of an API gateway, Azure EventGrid and Azure Service Bus that Intility hosts in Azure for internal event driven systems. Metro is used to handle commmunication between the servers, and between the UI and the servers. The listener for Metro is a simple worker application written in C#, dotnet 6. This is the only part which is not PowerShell, because we have a great template for dotnet Metro listener.
The data field of the Metro message is an instance of one big class that contains all the data that might be relevant for any job, such as the name, metadata or application specific instructions required by the bot. This approach gives us flexibility, with little complexity. The Metro message contains metadata such as the EventType (e.g., "ContentCreated"), Subject (lazy properties or tldr), and the JSON representation of the data.
When the MetroListener receives a message, it generates a PowerShell command that imports the AppPackBot module, runs the Receive-MetroEvent (with the previously mentioned JSON), and then saves it as a script with a random name. This PowerShell script is then run asynchronously with pwsh.exe. This ensures that the MetroListener only does the bare minimum - receives the message and runs PowerShell with the previously mentioned JSON as the only input.
WinGet is integrated as a source for version and links to installation files. When we find a package in our repo that matches a package in the WinGet-Pkgs repo, we tag our package with the Package Identifier of the app from WinGet. AppPackBot has a scheduled task that compares our packages with the ones in WinGet. If a tagged package of ours is out of date according to the WinGet repo, AppPackBot creates an order for itself in our internal portal, Workplace Portal. Sometimes we notice that an app is outdated and WinGet does not know yet. In those cases, we contribute back to WinGet with the new version, so that the scheduled task can get the update the next time it runs. HomeBrew is integrated in a similar manner for our Mac packages.
A flow for updating Microsoft Edge
To give you a better understanding of how all of this works, let's take a look at what happens when we update Microsoft Edge for Windows. We’re using this example as it touches almost every aspect of AppPackBot. You’ll likely pick up a lot of our packaging standards and security considerations along the way.
An order for updating Microsoft Edge is posted in Workplace Portal, either by a technician or the aforementioned scheduled task.
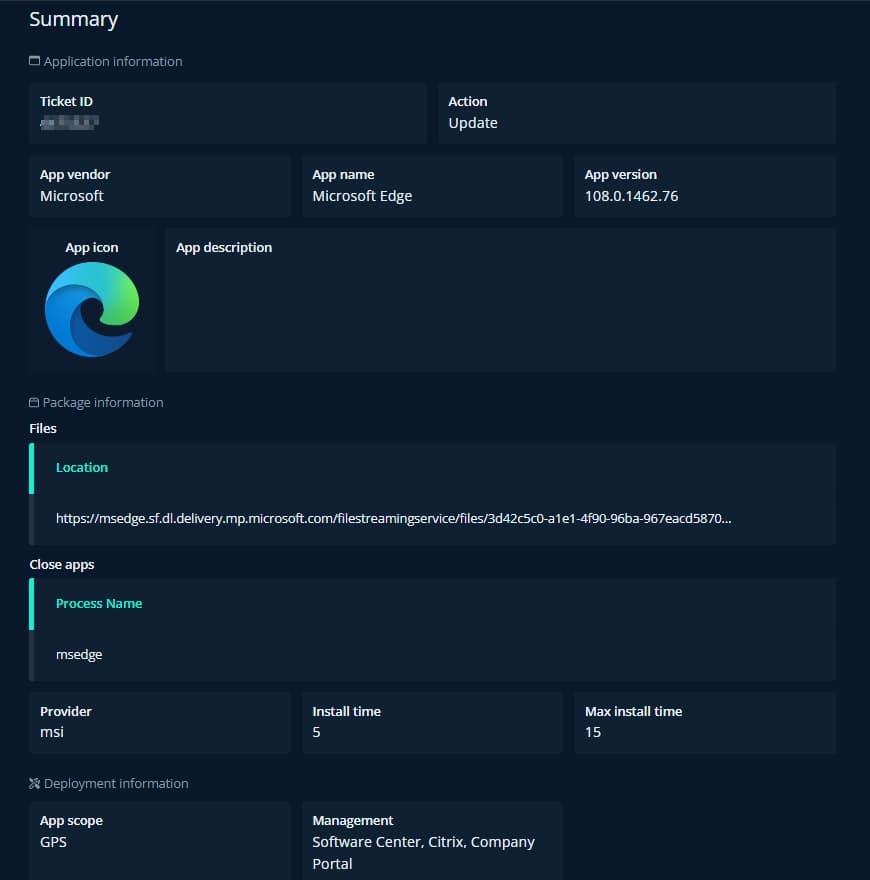
Summary of the request made to AppPackBot through Workplace Portal
The details of this request can’t necessarily be trusted, as it can contain errors due to bugs in the automation, or human error. The automated creation of the request uses the previous request as template, meaning that errors are rare in those cases. A specialized application packaging technician must look at the request, do modifications if necessary, and then click “Send to bot”. All steps below are happening on the Internal server, unless stated otherwise. Let’s look at what happens:
0: Checks and data validation
The first step is to validate the request data and gather metadata information based on the request. In this case, which is an update, we need the previous package as a source of information. Due to a standardized folder and naming structure, the bot can find that by itself. If the previous version is not found or anything is wrong, log it for the technician, exit the script, and try again later with correct data.
1: The Content
The next step is to create the package content.
- Grab our latest PSADT template, populate the data fields in Config.json such as vendor, name, version, apps to close, etc.
- Reuse functional scripts such as Install.ps1, Uninstall.ps1, Detection Method.ps1.
- Install.ps1 and Uninstall.ps1 should not contain anything version specific, so they can be reused as is
- The bot assumes Detection Method.ps1 contains the version number. Since this is an update job, just reuse the old script, replace the previous version with the new, so that the new script has the new version in it
- Download the provided files. Whitelisted paths are prefixed with https or UNC paths in a set of internal file servers
- Perform security analysis. In this context, this means trying to get the authenticodesignature of the files and storing the thumbprint of the certificate that signed the files. If that does not exist, store the hash of the files. Then, do the same on the files in the previous content. If the new files are introducing a new thumbprint or hash, we cannot automatically accept the files. In the case of Microsoft Edge, there is only 1 file, and that file is usually signed by the same cert every time. This file gets automatically accepted
- Put the generated content on the file server for packages, including the downloaded file into the Files folder
- Broadcast to Metro that content is created
2: Testing
Now we need to do a deep analysis of the content. This means:
- Get all metadata
- Regex out all mentioned server hostnames (they follow a naming convention)
- Look for general PowerShell errors using PSScriptAnalyzer
- Get total file size
- Get hypothetical longest/deepest path when the same content is placed in IMEcache folder (to make sure no file paths exceed the 260 char limit)
- Check whether the content is compatible with different management systems (for example the 8GB max size for Win32LOB apps on Intune)
- And lots of other information
The second step is to grab an available VM from a pool of Test VMs. Turn it on and wait for it to have an IP and be automatically logged on with a local user without local admin rights. Then, copy the content into the VM, plus a generated cmd script that:
- Runs the installation
- Kills relevant running applications (in case they started after installation, since some apps do that)
- Runs uninstallation
Using psexec, run the generated cmd asynchronously as the logged-on user or the system account, depending on the content. In this Edge case (ha ha), run as system.
Now the VM is off to do its thing while the bot waits. PSADT writes log files and some summaries as JSON files to the log location on the VM. Every ten seconds the bot robocopies out all logs and reads how things are going. This local copy on the server also enables the logs to get into our logging infrastructure (Splunk) on behalf of the VM.
If installation succeeds, the app is detected, uninstallation succeeds and the app is no longer detected, the whole test is considered a success. In any other case, or if the whole test takes longer than a predetermined timeout (typically 30 minutes), the test is considered a failure. In case of failure, a technician will need to fix the error and either fix the rest themselves or let the bot retry its test. Edge usually tests successfully, and in that case the bot broadcasts that the test was successful.
3: Updating the management systems
Now that the content is created and confirmed working, it's time to get it out into the management systems. These steps are done in parallel, so keep in mind that when reading steps a, b and c. (Everything so far has been in sequence).
Step a: Software Center
When the Internal Server gets the message about successful test and Software Center is a target, it simply finds the app by name in Configuration Manager and edits four things: The version number, content location, detection method script and date published. Then, it also distributes the new content to relevant Distribution Points.
Step b: Citrix
Our deployment tool of choice here only requires us to copy the content into another file server. So, when the Internal Server gets the message about successful test and Citrix is a target, it broadcasts a message that instructs to update on Citrix. This detour is done to spin up a parallel process to not interfere with another one. When the Internal Server gets this message, it updates the package for Citrix.
Step c: Company Portal
- First, we need to create the intunewin file. When the Internal Server gets the message about successful test, and the content is Intune-compatible (see part 2), it creates the intunewin file, places that as well on the file server and broadcasts that the intunewin file is created and its path.
- When the External server receives this message, it looks at the path and parses who this file is for. Since this example is Microsoft Edge, it's an app shared between customers. Since every customer, however, has their own tenant, we must update Microsoft Edge on every customer tenant. The External Server gets a list of all tenants who have a Win32LOB application named “Microsoft Edge” and starts a loop. The loop creates a PowerShell Job that does the actual authentication against customer tenant, uploading of the intunewin file and updating metadata about the application. This way, the server can spin up multiple parallel processes that upload to their respective customer tenant and really saturate all the compute of the server and the bandwidth of the connection between our datacenters and Azure. A few years ago this process was serial, meaning it looped through one Intune tenant after another. In Edge’s case that would mean 2m30s x 81 Intune tenants = About 3 hours and 20 minutes. The parallel way takes about 12-13 minutes, which is a 16x speed improvement! In addition to Intune Graph API seeming to be a bottle neck, we’re also limiting how hard the server is allowed to work at this stage. Just a simple “if CPU is working harder than 75%, wait 10 seconds and try again” before starting another parallel process. Other jobs might need to run too.
- It’s only considered a success if every parallel job finishes without error. We’re experiencing sporadic errors from the Graph API in the form of http codes like 429 and 503, even though these requests are way below the rate limits of Azure. To be fair, we’re using the beta version of Microsoft Graph, which is the only version that can manage all the properties we use for Win32LOB applications (such as displayVersion). A quick look in the developer tools of a web browser when managing apps manually in Intune reveals that the web portal itself uses the beta API. If anything fails, an application packaging technician investigates the failures and fixes them.
The job is now done! All these steps were for 1 application; multiple can run in parallel.
Below you can see a step-by-step visualization of the entire process where the different instances are illuminated as you progress through each step.

Visuals and insights
Having successfully created a flow that can process information between different instances, the last piece of the puzzle was to create an interface that made it possible to interact with the bot in a secure and intuitive way. The visual interface shown below is our first design attempt, however it's in constant change as new features are added continuously. The interface is hosted in Workplace Portal and provides valuable insight, including:
- Key stats such as the success rate of AppPackBot jobs
- The unique steps and processes of each deployment with coherent checkmarks or X’s depending on if it was a success or failure
- Generated link to Splunk for log analysis and error handling
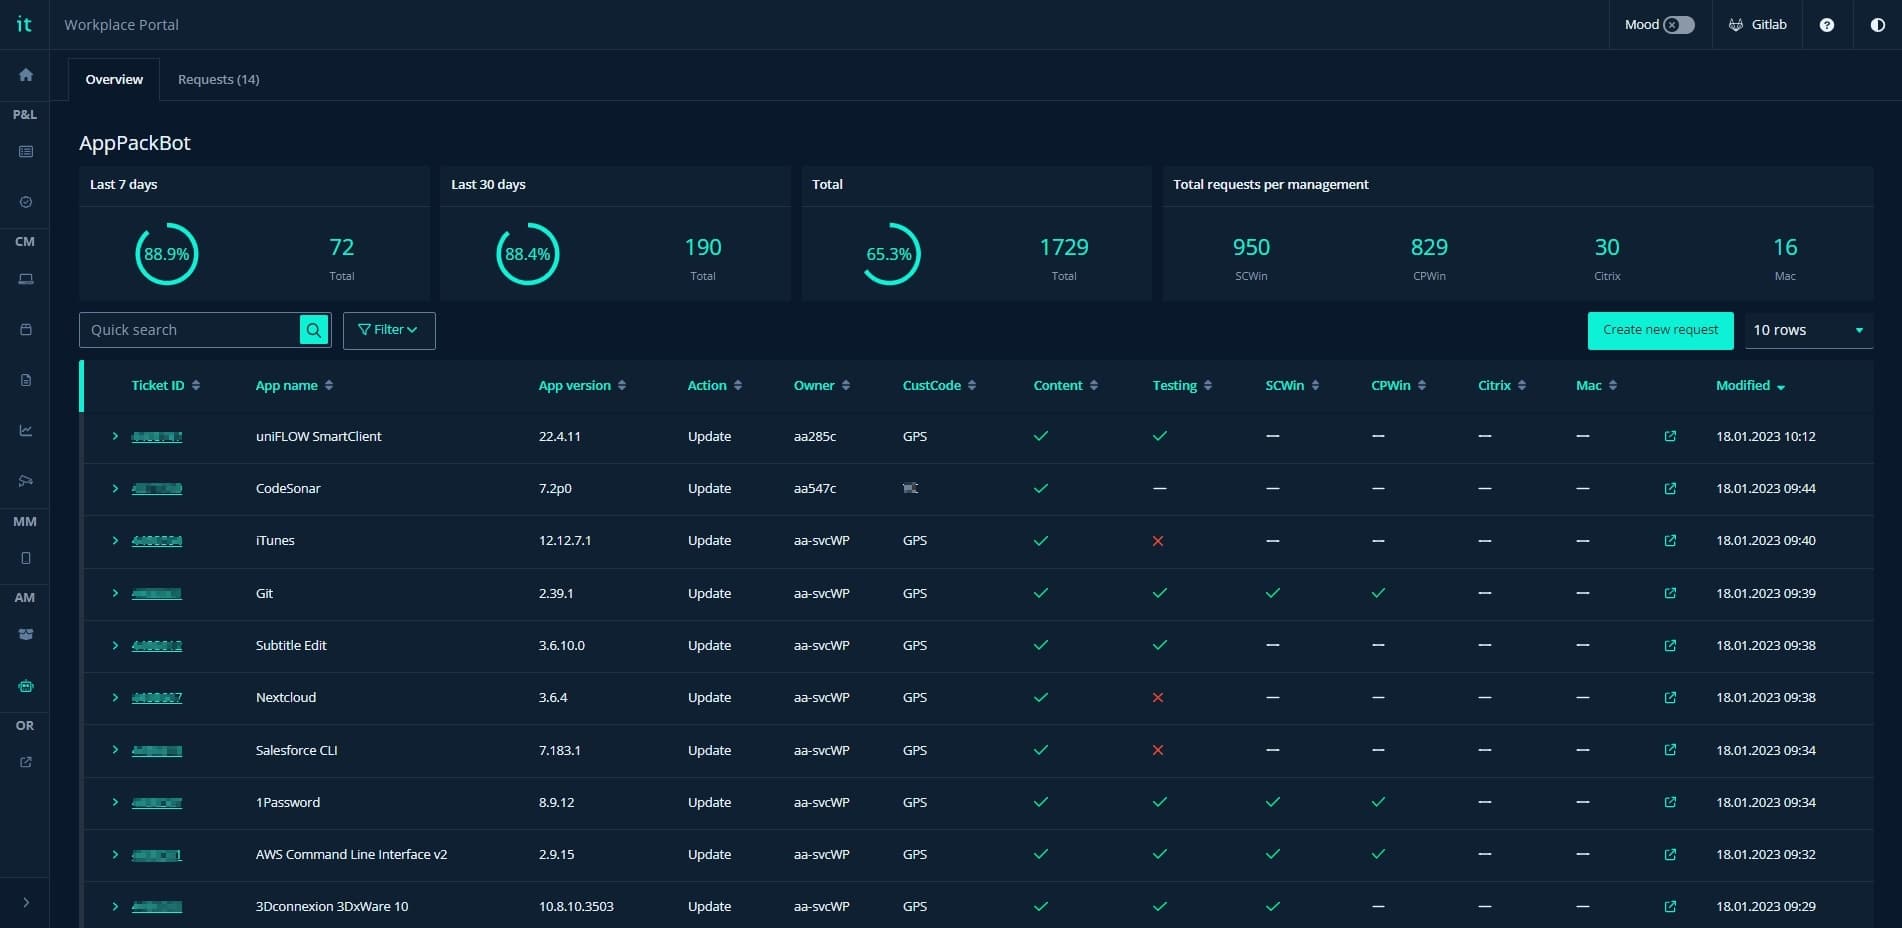
AppPackBot dashboard hosted in Workplace Portal
Summary
The adaptation of AppPackBot is still in its early stage and there are plenty of features still to come. However, we can already see clear trends that this virtual colleague can help execute large parts of an already standardized and automated process. Since it was introduced internally in April 2022, we have estimated that it has helped reduce time spent on application packaging by over 850 hours. We’re excited to see what this adds up to in a full year with more automation still to come.
if (wantUpdates == true) {followIntilityOnLinkedIn();}

